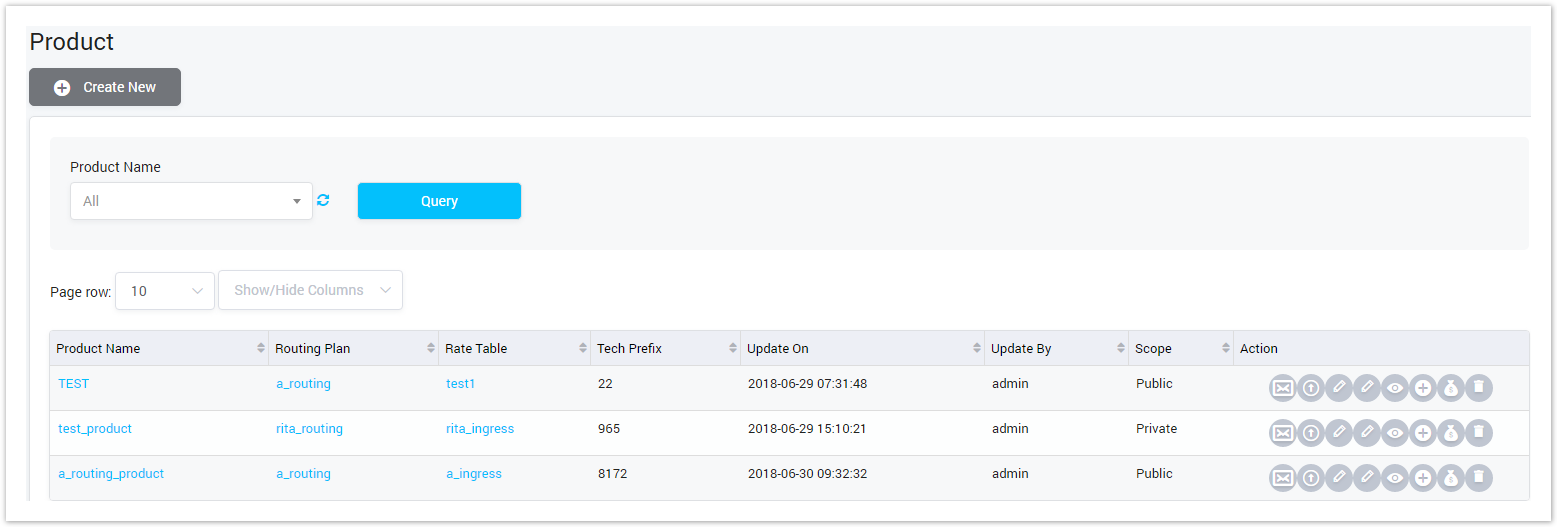
Column Name | Description |
| Product Name | The name of the product. |
| Routing Plan | The routing plan associated with the product. |
| Rate Table | The rate table associated with the product. |
| Tech Prefix | The tech prefix associated with the product. |
| Update On | The date/time when the product was last updated. |
| Update By | The user who last updated the product. |
| Scope | The scope of the product, such as public or private. |
| Action | The actions performed on the product. |
| Button | Description |
|---|---|
| Is used to refresh to get latest the list of product. |
| Is used to select the product that you want to see details. Selecting name of the product then click on the Query button, the details of product will be displayed. |
| Is used to set the total of records per a page. |
| Is used to select the column which will be shown/hidden. |
| Is used to go to next, previous page. It is also used to go to the specific page by clicking on the number of page. |


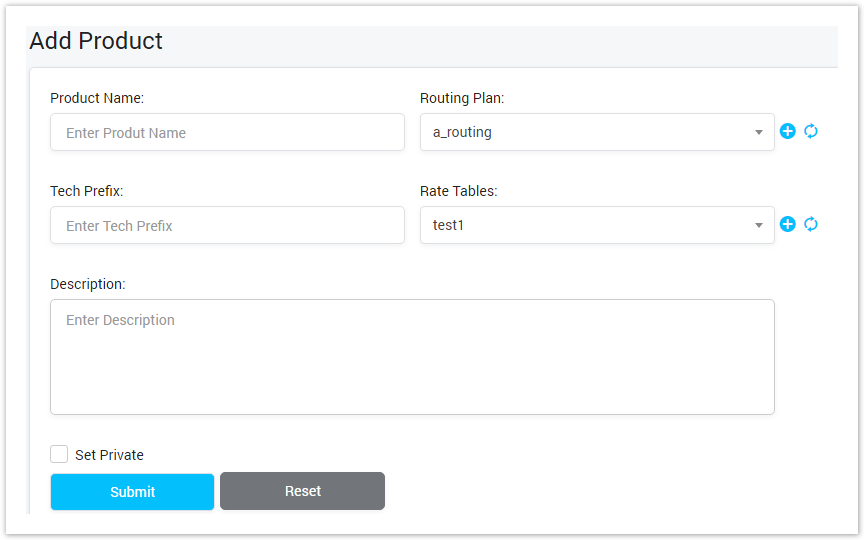
Add New Product
To add new Product, click on the Create New button. The add new Product page will be displayed as below:
Screenshot: Add New Product
| Field Name | Description |
|---|---|
| Product Name | Set name of the Product. |
| Routing Plan | Select the Routing Plan. Click icon |
| Tech Prefix | Set the Tech Prefix for Product. |
| Rate Tables | Select the Rate Tables. Click icon |
| Description | Input the description for Product. |
| Set Private | Set the scope for Product. |


Product Details
In the action column of Product List, you can see many actions that we can perform for product. We will touch on each action in this section.
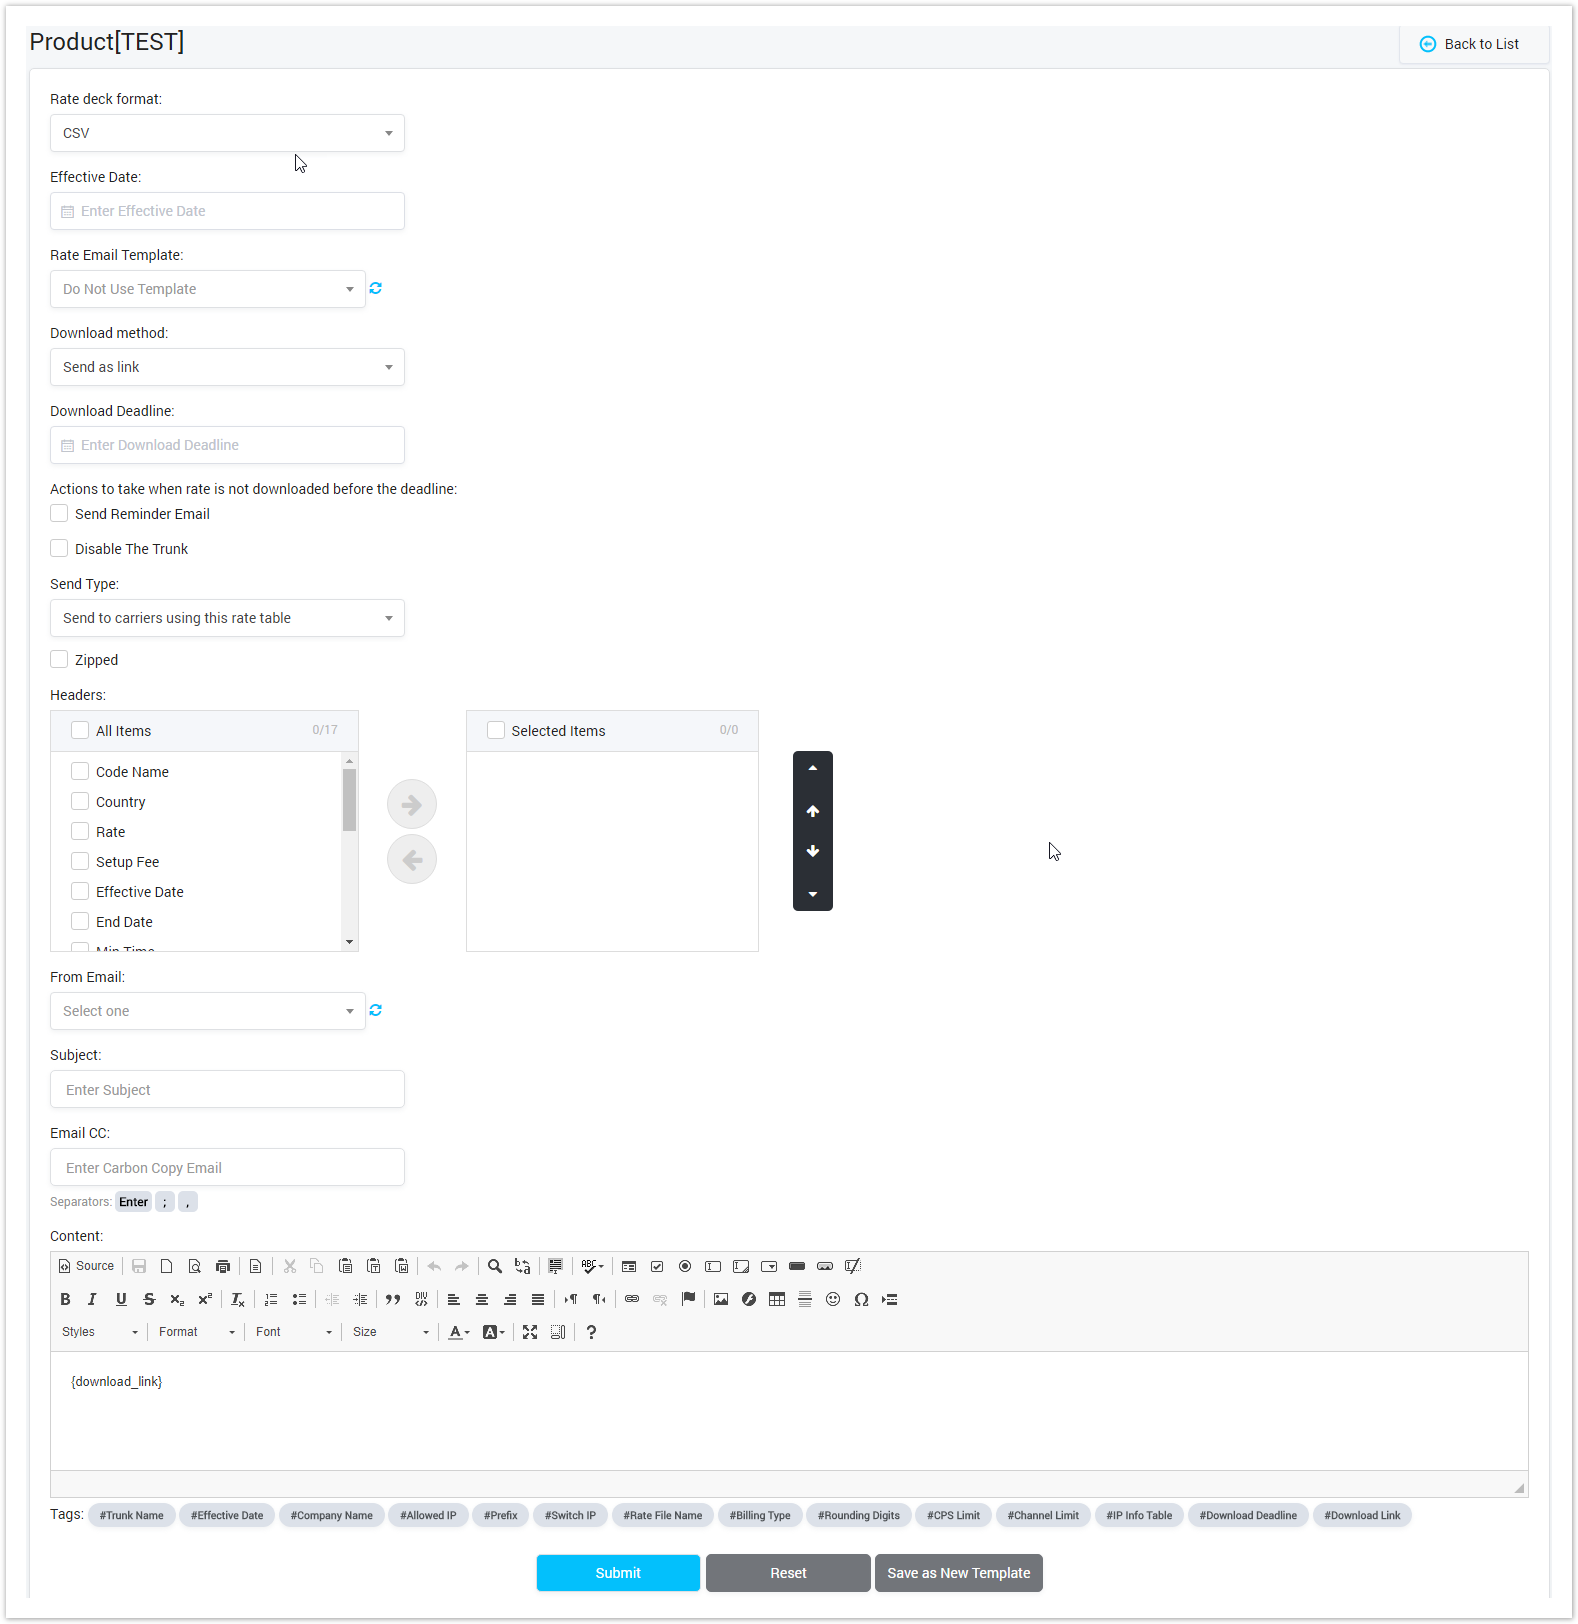
SEND RATE
To send rate to the client, click on ![]() icon, the Send Rate page will be displayed as below:
icon, the Send Rate page will be displayed as below:
Screenshot: Send Rate
| Field Name | Description |
|---|---|
| Rate deck format | Selecting format of Rate Deck file: CSV or XLS |
| Effective Date | Set the date time when Rate effective. |
| Rate Email Template | Select template for Send Rate email. |
| Download method | Set the way to download Rate Deck file:
|
| Download Deadline | Set the last datetime to download file. After this date, the Rate Deck file will not available anymore. |
| Actions to take when rate is not downloaded before the deadline | Set the action to take when rate is not downloaded before the deadline.
|
| Send Type | Select the type of recipients. |
| Zipped | Check if you want to zip the Rate Deck file. |
| Headers | Select the header of the Rate Deck file. |
| From Email | Select the sender of the email. |
| Subject | Input the subject of email. |
| Email CC | Carbon Copy in email. |
| Content | Content of email. |
After filling in all fields, click Submit button to send rate - click Reset button to clear all fields and click Save as New Template button to save this template for next time.
UPLOAD RATE
To upload Rate, you have to click on ![]() icon. for further information, please refer Upload Rate setion in Rate Table page.
icon. for further information, please refer Upload Rate setion in Rate Table page.
EDIT RATE
To edit Rate, you have to click on ![]() icon. for further information, please refer Edit Rate setion in Rate Table page.
icon. for further information, please refer Edit Rate setion in Rate Table page.
EDIT PRODUCT
To edit Product, click on ![]() icon. You will be redirected to the page like add new product page. Refer Add New Product part for further information.
icon. You will be redirected to the page like add new product page. Refer Add New Product part for further information.
ALLOWED CLIENT
This section is used to allow the Client on specific product. After allowing client, the client can see this product.
Click on ![]() icon, there is a pop-up as below:
icon, there is a pop-up as below:
Screenshot: Allowed Client
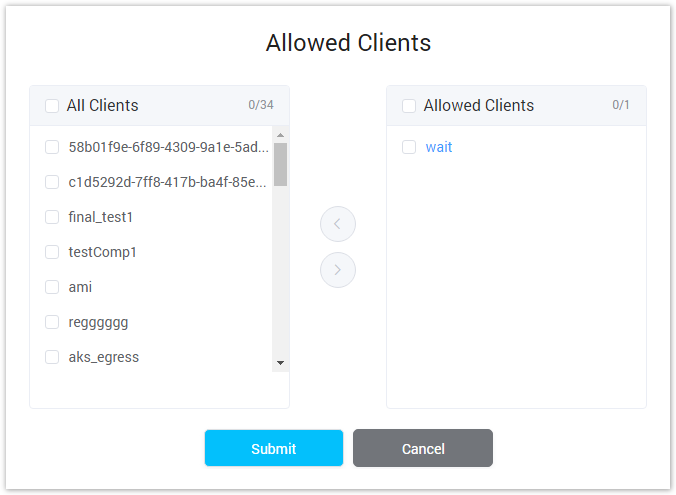
Select Client then click on Submit button to save.
ASSIGN PRODUCT
The agent can sell those products to their own clients and the agent can assign products to their own clients. This action is used to assign product to the related Client.
Click on ![]() icon, there is a pop-up as below:
icon, there is a pop-up as below:
Screenshot: Assign Product

| Field Name | Description |
|---|---|
| Carrier | Select the Carrier that you want to assign product to. |
| Trunk Name | Select Trunk Name. |
| Copy IP From | Select IP. |
| IP Address | Add new IP for Product. |
| Port | Set port to IP. |
RATE GENERATION
This action is used to generate the Rate to Product. Click on ![]() icon. Please refer Rate Generation for further information.
icon. Please refer Rate Generation for further information.
DELETE PRODUCT
To delete product, click on ![]() icon, there is a pop-up as below:
icon, there is a pop-up as below:
Screenshot: Delete Product
Click Confirm button to Delete, Click Cancel button to ignore.
Related pages
Popular Topics
Recently Updated Pages