QuerThis section is used to display all registrations in the system as well as allow admin to edit, approve, reject and delete Registration.
Registration List Query Form
This form allows the user to query data from Registration List.
By click on Management → Registration → This form will be displayed as below:
Screenshot: Registration List Query Form
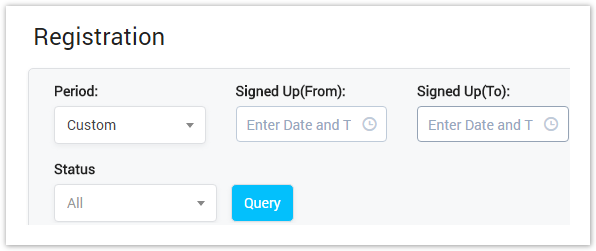
On this page:
| Field Name | Description |
|---|---|
| Period | Select the period time when the registration happened. It can be:
|
| Status | Select the status of registration. It can be:
|
Registration List
Filling in criteria then click on the Query button, the list of the registration will be displayed as below:
Screenshot: Registration List
Column Name | Description |
Username | Username of Registrant. It is used to login to the system. |
Main Email Address | The Main Email Address of Registrant. |
| Company | The Company Name of Registrant. |
| Referral | Someone in the system who introduced the system to Registrant. |
| Client Name | Name of Client in System who related to this registration. |
| Phone Number | Phone Number of Registrant. |
| Registration Time | The Date/Time Registration. |
| Operation Time | The date/time when the Registrant was approved/rejected. |
| Status | The status of Registration. |
| Button | Description |
|---|---|
| Is used to edit the User's information. |
| Is displays when status is new. It is used to approve the registration. |
| Is displays when status is new. It is used to reject the registration. |
| Is used to delete the Registration. |
| Is used to download the list of Registration by two types of file: CSV and XLS. |
| Is used to refresh to get latest the list of Registration. |
| Is used to select the field which the search function will query on. |
| Is used to input the keyword to query. |
| Is used to set the total of records per a page. |
| Is used to select the column which will be shown/hidden. |
| Is used to go to next, previous page. It is also used to go to the specific page by clicking on the number of page. |


Related pages
Popular Topics
Recently Updated Pages