Client List
This section is used to manage all clients in the system.
It includes three part: Action performed on Client, Query FormandClient List Form
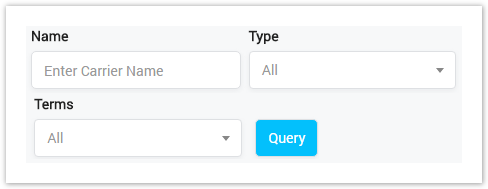
Client List Query Form
Click on Manage → Carrier → Select Client List tab, this form will be displayed and allow the user to query data.
Screenshot: Client List Query Form
| Field Name | Description |
|---|---|
| Name | Query by name of the client. |
| Type | Query by type of the client:
|
| Terms | Query by payment terms of the client
|
| Panel | |
|---|---|
On this page:
|
Client List Form
Filling in criteria then click on the Query button, the list of Clients will be displayed as below:
Screenshot: Client List Form
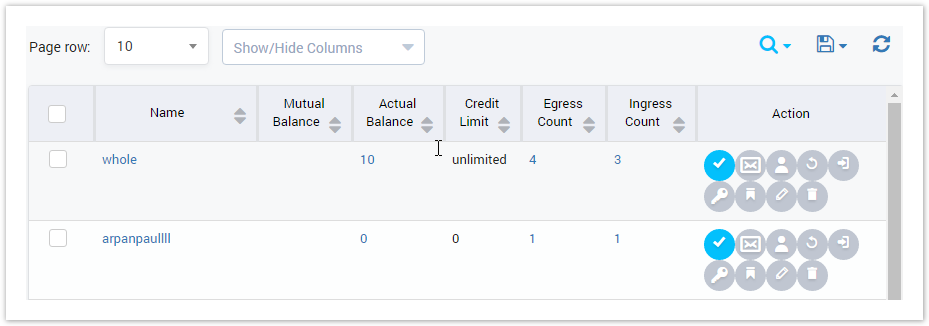
| Column Name | Description |
|---|---|
| Name | Name of the client. |
| Mutual Balance | Mutual Balance of the client. Mutual Balance is used for Mutual Transaction. |
| Actual Balance | Actual Balance of the client. Actual Balance is used for Mutual Transaction. |
| Credit Limit | Credit Limit of the client. |
| Egress Count | Total Egress assigned to the client. Click on this number, the user will be redirected to the Egress Trunk page. |
| Ingress Count | Total Ingress assigned to the client. Click on this number, the user will be redirected to the Ingress Trunk page. |
| Action | Actionperformed on the client. |
| Button | Description |
|---|---|
| Is used to activate/deactivate the client. |
| Is used to send low blance alert to the client. |
| Is used to send the welcome letter to the client. |
| Is used to reset the balance of the client. |
| Is used to log in via client portal. |
| Is used to change the passwordofthe client. |
| Is used to save the client's information astemplate. |
| Is used to edit the carrier information. |
| Is used to delete the carrier. |
| Is used to download the list of carriers by two types of file: CSV and XLS. |
| Is used to refresh to get latest the list of carriers. |
| Is used to select the field which the search function will query on. |
| Is used to input the keyword to query. |
| Is used to set the total of records per a page. |
| Is used to select the column which will be shown/hidden. |
| Is used to go to next, previous page. It is also used to go to the specific page by clicking on the number ofpage. |


Adding New Client
To adding the new client, click on the Create New button. The main window will be displayed as below:
Screenshot: Basic Info
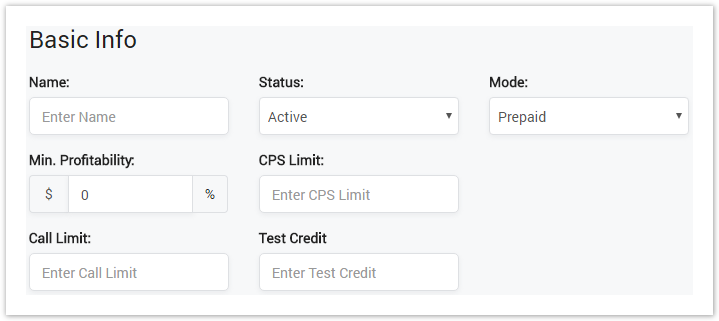
This tab is used to configure the basic information of the client.
| Field Name | Description |
|---|---|
| Name | Name of the client. |
| Status | Statusof the client. |
| Mode | Payment mode of the client.
|
| Min. Profitability | Minimum of profitability |
| CPS Limit | The limit ofcallper second. |
| Call Limit | The limit of call. |
| Test Credit | The credit will be purchased before services can be used. It is used to prepaid mode only. |
Screenshot: Company Info
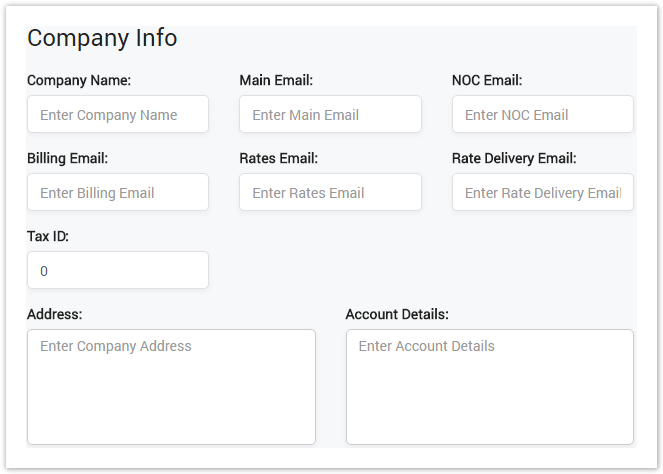
This tab is used to configure the basic information of the client's company.
| Field Name | Description |
|---|---|
| Company Name | The name of company. |
| Mail Email | The email used to receive Daily Usage and Daily CDR |
| NOC Email | The email used to receive Trunk Update. |
| Billing Email | The email used to receive Bill and Invoice. |
| Rates Email | The email used to receive Rates. |
| Rate Delivery Email | The email used to send Rates. |
| Tax ID | The Tax ID of the company. |
| Address | The Address of company. |
| Account Details | The Account Details of the company. |
Screenshot: Automatic Report
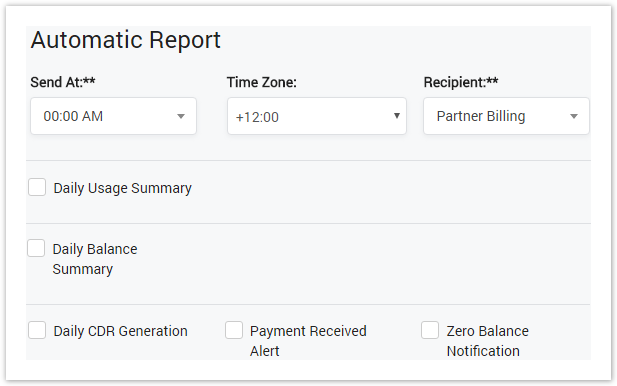
This tab is used to configure the automatic report for the client.
| Field Name | Description |
|---|---|
| Send At | Set the time to sendreport. |
| Time Zone | Set the time zone will be applied on schedule. |
| Recipient | Select the receiver: Partner Billing, My Billing or both. |
| Tip |
|---|
Select the type of report to send by check on the checkbox. What report is checked will be sent to the recipient. |
Screenshot: Short Call Charge
This tab is used to set the way to charge for the short call.

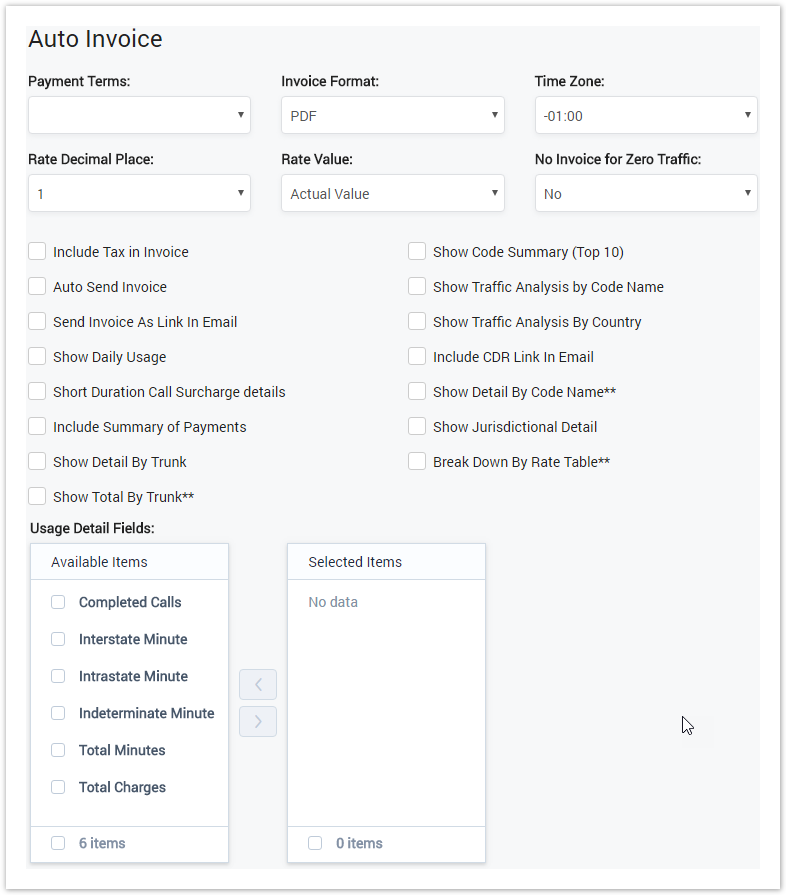
Screenshot: Auto Invoice
This tab is used to configure the auto invoice fot the client.
| Field Name | Description | ||||||||||
|---|---|---|---|---|---|---|---|---|---|---|---|
| Payment Terms | Select the schedule to payment. | ||||||||||
| Invoice Format | Select the format of invoice. It can be: PDF, Excel and HTML | ||||||||||
| Time Zone | Select the time zone will apply to the schedule to payment. | ||||||||||
| Rate Decimal Place | Rate Decimal Place for all values in invoice. | ||||||||||
| Rate Value | Rate value in invoice. Count by Average Rate or Actual Rate. | ||||||||||
| No Invoice for Zero Traffic | Select yes, there is no invoice is generated for Zero Traffic and vice versa | ||||||||||
| Usage Detail Fields | Select Usage Detail Fields will be displayed on invoice:
|
| Tip |
|---|
Select the field you want to show on invoice by check on the checkbox. What field is checked will be displayed on invoice. |
Screenshot: Carrier Self-service Portal
This tab is used to configure UI and funtion of web portal after client log in.
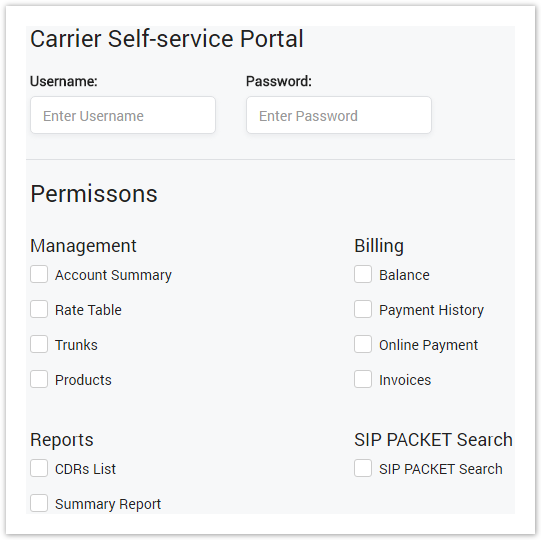
| Field Name | Description |
|---|---|
| Username | Set the username to login to the portal. |
| Password | Set the password to login to the portal. |
| Permission | Set the permission for the client. User will have permission on the checked pages. |
Screenshot: Notification Setting
This tab is used to configure the Low Balance Notification and Trunk Update Notification for the client.

Filling in the information, click Submit button to save.
| Tip |
|---|
The faster way to create new client is Creat New By Template. There is template with some information, you have to put the rest to create new. Please refer Carrier Template for further details. |
Export Client List
To export client list, click on the Export button then the main window will be displayed as below:
Screenshot: Export Client List
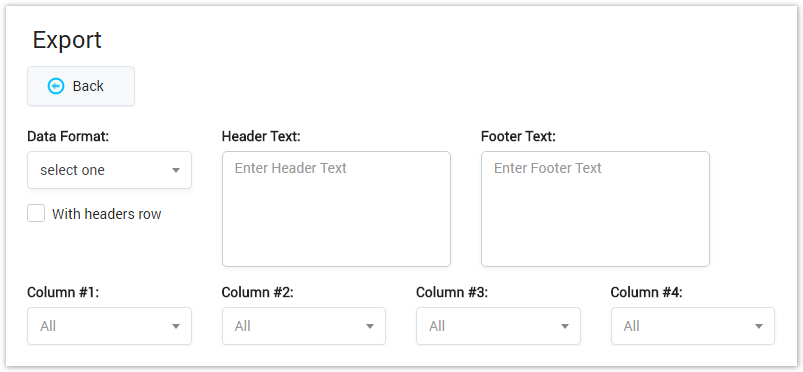
| Field Name | Description |
|---|---|
| Data Format | Set the format of export file. It can be: CSV or XLS. |
| Header Text | Input the header text for export file. |
| Footer Text | Input the footer text for export file. |
| With headers row | Check it if you want add a blank row on the top. |
| Column | Select the column will be displayed in export file. |
Filling in criteria, then click the Download button to export file.
Download Balance
To download the balance of all clients, click on the Download Balance button. The main window will be displayed as below:
Screenshot: Download Balance
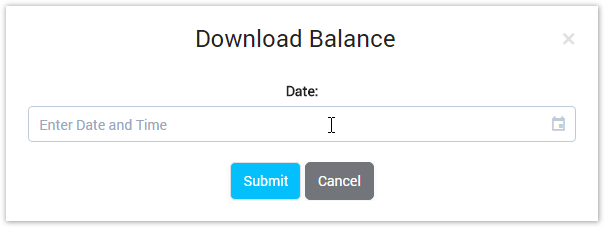
Set the date then click Submit to download. The balance will be counted at the date that we selected.
Activate All
This button is used to activate all clients in system. Click on it, all clients will be activated.
Deactivate All
This button is used to deactivate all clients in system. Click on it, all clients will be deactivated.
Deactivate Selected
This button is used to deactivate all selected clients. Click on it, all selected clients will be deactivated. We select the client by check on the checkbox on the left of client name.
Related pages
| Content by Label | ||||||||||||||
|---|---|---|---|---|---|---|---|---|---|---|---|---|---|---|
|
Popular Topics
| Popular Labels | ||||
|---|---|---|---|---|
|
Recently Updated Pages
| Recently Updated | ||||||||
|---|---|---|---|---|---|---|---|---|
|